
Pattern Description:
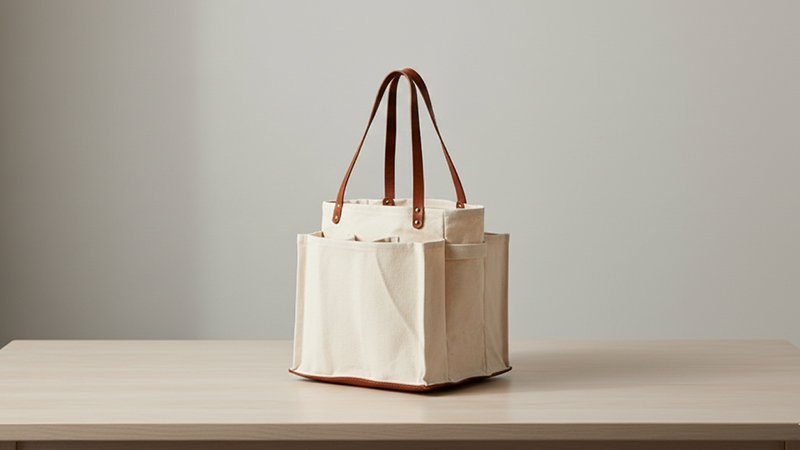
This DIY Market Tote with Side Pockets is a stylish and functional bag featuring a wipeable clear vinyl bottom, internal pockets, and a ribbon drawstring closure.
Made with durable fabrics, it’s easy to sew and perfect for everyday use. The design includes reinforced straps, optional snaps, and a roomy interior, ideal for shopping trips, picnics, or casual outings.
Materials Needed & Measurements:
- Main Fabric: 2 pieces 18″ x 18″
- Pocket Fabric: 2 pieces 10″ x 18″
- Clear Vinyl: 21″ x 18″.
- Strap Fabric: 2 pieces 3″ x 36″
- Ribbon: 2.5 yards.
- Snaps and snap setter: 2 (This item is optional).
Instructions for Making the Market Tote with Side Pockets Pattern:
Preparing the Fabric Components
First, you must create the foundation of the main bag and the pocket pieces.
- Sew the bottom edges of the main fabric pieces together to form the bottom seam of the bag. If your fabric design is directional, make sure to pay attention to that.
- Perform the same sewing step for the pocket fabric pieces.
- Finish the top edges of both the main fabrics and the pocket fabrics by using a serge or zig zag stitch.
- Iron the top edges of the pocket pieces under 1 inch.
Assembling the Vinyl and Pockets
This section involves integrating the clear vinyl to ensure the bottom of the bag is wipeable and water resistant.
- Lay the clear vinyl over the right side of the pocket piece.
- Fold the top edges over and clip them into place.
- Sew across one of the top edges using a 1/2 inch seam allowance, making sure that you catch all four layers (the folded fabric and the folded vinyl).
- Repeat this sewing process on the other top edge.
- Lay the now vinyl-covered pocket over the opened main fabric and pin it at the bottom seam.
- On one side, find the center point and sew a line down the center of the pocket piece, attaching it to the main fabric. This action creates two smaller pockets on one side of the bag.
Creating and Attaching the Straps
The straps are prepared next and reinforced onto the bag body.
- To make the straps, iron each strap piece lengthwise with right sides together.
- Sew the straps using a 1/4 inch seam allowance.
- Turn the straps right side out, tuck in the ends, and iron them.
- Measure 4 inches in from the edge of the pocket and pin the strap to the main fabric about one inch below the pocket.
- Measure 3 inches up from the top of the pocket and place a second pin.
- Pin the other side of the strap 4 inches in from the other edge.
- Repeat the pinning process for the other side of the bag.
- Sew the straps on, forming an “X box” at each end to reinforce the stitches. Continue sewing along the sides from the bottom of the strap up to the point marked 3 inches above the pocket, finishing in another “X box”.
Forming the Drawstring Casing and Sides
The bag edges are finished, and the drawstring casing is prepared.
- Serge both sides of the bag fabric to finish the edges and attach the pocket to the main fabric. At this stage, the bag should still be opened flat with the bottom seam centered.
- Iron the top edges under 3 inches.
- Sew a line across the top edges at the bottom edge of the fold (which is about 2.75 inches down from the fold).
- Sew a second line 1/2 inch above the first line.
- Repeat these two sewing lines on the other side of the bag.
Final Assembly and Details
- Fold the bag in half with wrong sides together, ensuring the bottom seam is positioned at the bottom.
- Tuck the side edges of the bag under to hide the serging and clip the edges together.
- Place a piece of tissue paper under the vinyl before sewing. Sew from the bottom of the casing down to the bottom edge of the bag, and repeat this step on the other side.
- Peel off any remaining tissue paper.
- Thread one piece of ribbon in from the right side, looping back in from the other side, and then knot it.
- Repeat the threading process with the second ribbon, but start feeding it in from the left side.
- Optionally, add the two snaps onto the large pocket side. Position the snaps right in front of the straps so they attach to the thicker, reinforced part of the bag.